728x90
<Docker 네트워크 설정>
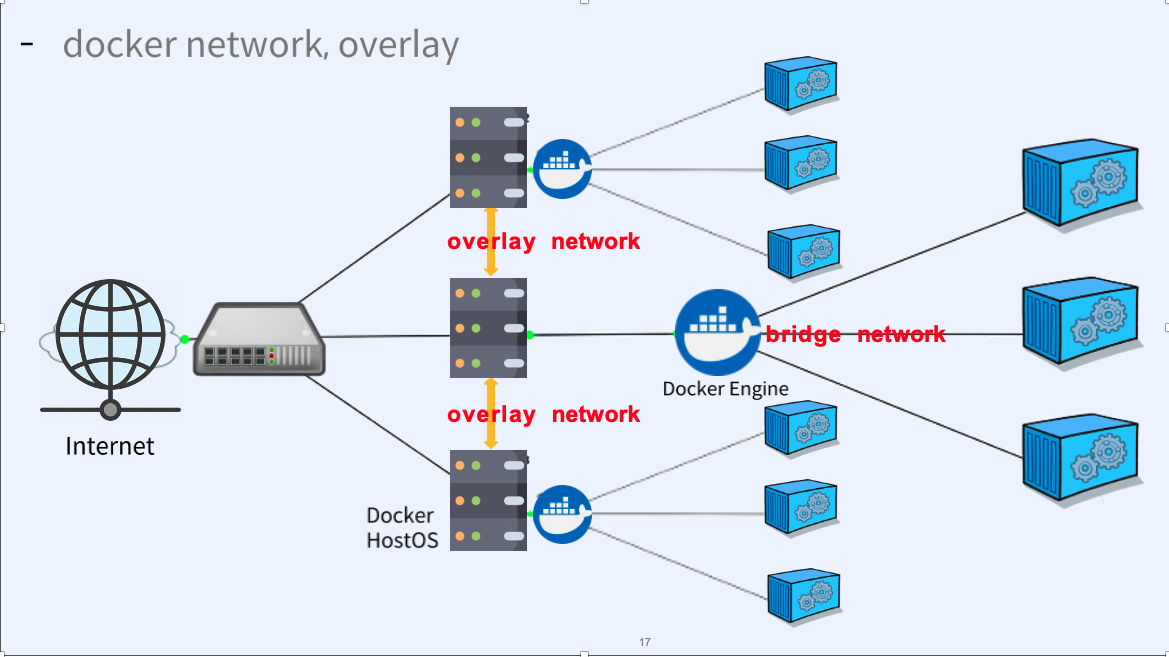
- 브릿지 네트워크
- 기본적으로 도커가 설치될 때 생성되는 네트워크
- 컨테이너들 간에는 이 네트워크를 통해 통신 가능
- 호스트 OS와 분리되어 있어, 호스트와 다른 IP 주소 범위를 사용
- 호스트 네크워트
- 호스트와 동일한 네트워크 인터페이스를 사용하므로 호스트의 IP 주소를 그대로 사용
- 외부에서 컨테이너로의 접근이 더 간단해지지만, 여러 컨테이너 간의 격리 감소
- 오버레이 네트워크
- 여러 호스트에 걸쳐 있는 컨테이너 간 통신을 지원하는 네트워크
- 컨테이너의 IP 주소와 가상의 MAC 주소를 관리하여 호스트 간 통신 용이
<bridge-utils 설정>
ubuntu@host1:~$ sudo apt install bridge-utils
[sudo] ubuntu 암호:
패키지 목록을 읽는 중입니다... 완료
의존성 트리를 만드는 중입니다... 완료
상태 정보를 읽는 중입니다... 완료
제안하는 패키지:
  ifupdown
다음 새 패키지를 설치할 것입니다:
  bridge-utils
0개 업그레이드, 1개 새로 설치, 0개 제거 및 48개 업그레이드 안 함.
34.4 k바이트 아카이브를 받아야 합니다.
이 작업 후 121 k바이트의 디스크 공간을 더 사용하게 됩니다.
받기:1 <http://kr.archive.ubuntu.com/ubuntu> jammy/main amd64 bridge-utils amd64 1.7-1ubuntu3 [34.4 kB]
내려받기 34.4 k바이트, 소요시간 1초 (35.8 k바이트/초)
Selecting previously unselected package bridge-utils.
(데이터베이스 읽는중 ...현재 209527개의 파일과 디렉터리가 설치되어 있습니다.)
Preparing to unpack .../bridge-utils_1.7-1ubuntu3_amd64.deb ...
Unpacking bridge-utils (1.7-1ubuntu3) ...
bridge-utils (1.7-1ubuntu3) 설정하는 중입니다 ...
Processing triggers for man-db (2.10.2-1) ...
- bridge-utils: NIC(Network Interface Card) 두 개를 하나로 묶어 브릿지로 만들어 주는 역할 (이더넷 주소를 기반으로 전송)
ubuntu@host1:~$ brctl show
bridge name     bridge id               STP enabled     interfaces
docker0         8000.0242c1974574       no              veth79b95b3
<컨테이너 라우터 확인>
ubuntu@host1:~$ docker container exec -it ubuntu route
Kernel IP routing table
Destination     Gateway         Genmask         Flags Metric Ref    Use Iface
default         172.17.0.1      0.0.0.0         UG    0      0        0 eth0
172.17.0.0      *               255.255.0.0     U     0      0        0 eth0
<라우팅 테이블 확인 명령어>
- route
- ip route
ubuntu@host1:~$ route
Kernel IP routing table
Destination     Gateway         Genmask         Flags Metric Ref    Use Iface
default         _gateway        0.0.0.0         UG    100    0        0 enp0s3
default         192.168.56.2    0.0.0.0         UG    20101  0        0 enp0s8
10.0.2.0        0.0.0.0         255.255.255.0   U     100    0        0 enp0s3
link-local      0.0.0.0         255.255.0.0     U     1000   0        0 enp0s3
172.17.0.0      0.0.0.0         255.255.0.0     U     0      0        0 docker0
172.18.0.0      0.0.0.0         255.255.0.0     U     0      0        0 br-5d20ddd4847a
192.168.55.0    0.0.0.0         255.255.255.0   U     0      0        0 br-2881784d86b9
192.168.56.0    0.0.0.0         255.255.255.0   U     101    0        0 enp0s8
ubuntu@host1:~$ ip route
default via 10.0.2.2 dev enp0s3 proto dhcp metric 100
default via 192.168.56.2 dev enp0s8 proto static metric 20101
10.0.2.0/24 dev enp0s3 proto kernel scope link src 10.0.2.15 metric 100
169.254.0.0/16 dev enp0s3 scope link metric 1000
172.17.0.0/16 dev docker0 proto kernel scope link src 172.17.0.1 linkdown
172.18.0.0/16 dev br-5d20ddd4847a proto kernel scope link src 172.18.0.1
192.168.55.0/24 dev br-2881784d86b9 proto kernel scope link src 192.168.55.1
192.168.56.0/24 dev enp0s8 proto kernel scope link src 192.168.56.101 metric 101
<컨테이너 ip 주소 확인>
- docker container exec
ubuntu@host1:~$ docker container exec -it ubuntu ip addr
1: lo: <LOOPBACK,UP,LOWER_UP> mtu 65536 qdisc noqueue state UNKNOWN group default qlen 1000
    link/loopback 00:00:00:00:00:00 brd 00:00:00:00:00:00
    inet 127.0.0.1/8 scope host lo
       valid_lft forever preferred_lft forever
7: eth0@if8: <BROADCAST,MULTICAST,UP,LOWER_UP> mtu 1500 qdisc noqueue state UP group default
    link/ether 02:42:ac:11:00:03 brd ff:ff:ff:ff:ff:ff
    inet 172.17.0.3/16 brd 172.17.255.255 scope global eth0
       valid_lft forever preferred_lft forever
- docker container inspect
ubuntu@host1:~$ docker container inspect -f "{{ .NetworkSettings.IPAddress }}" ubuntu
**172.17.0.3**
ubuntu@host1:~$ docker network inspect -f "{{ .Containers }}" bridge
map[be693481e6c04508764c53f7f9f8a11a9358e93f6a004cc11a03027446964100:{musing_visvesvaraya 6108b1c18e42805fe4368eac3cc363b99d46ef3c23b8ab34e4bc1e1a3d8a8d22 02:42:ac:11:00:02 172.17.0.2/16 } d098bc70d77a516af359d81d65b568d6d47b4653f4d6d252a9b2dc5413e5c10e:{ubuntu 50180a6305369fffb2ef13b612f0702b1c41ada5c8ecd6264fdc81508a3a3f97 02:42:ac:11:00:03 **172.17.0.3/16** }]
ubuntu@host1:~$ docker container inspect ubuntu | grep Mac
            "MacAddress": "02:42:ac:11:00:03",
                    "MacAddress": "02:42:ac:11:00:03",
ubuntu@host1:~$ docker container inspect ubuntu | grep IPAddress
            "SecondaryIPAddresses": null,
            "IPAddress": "172.17.0.3",
                    "IPAddress": "172.17.0.3",
<컨테이너 DNS 설정>
- --dns: dns ip 주소 입력
ubuntu@host1:~$ docker container run -it --dns=8.8.8.8 centos bash
Unable to find image 'centos:latest' locally
latest: Pulling from library/centos
a1d0c7532777: Pull complete
Digest: sha256:a27fd8080b517143cbbbab9dfb7c8571c40d67d534bbdee55bd6c473f432b177
Status: Downloaded newer image for centos:latest
<DNS 작동 확인>
[root@9e223eae5907 /]# ping www.naver.com
PING e6030.a.akamaiedge.net (23.52.32.147) 56(84) bytes of data.
64 bytes from a23-52-32-147.deploy.static.akamaitechnologies.com (23.52.32.147): icmp_seq=1 ttl=53 time=9.45 ms
64 bytes from a23-52-32-147.deploy.static.akamaitechnologies.com (23.52.32.147): icmp_seq=2 ttl=53 time=7.83 ms
64 bytes from a23-52-32-147.deploy.static.akamaitechnologies.com (23.52.32.147): icmp_seq=3 ttl=53 time=12.2 ms
64 bytes from a23-52-32-147.deploy.static.akamaitechnologies.com (23.52.32.147): icmp_seq=4 ttl=53 time=17.6 ms
64 bytes from a23-52-32-147.deploy.static.akamaitechnologies.com (23.52.32.147): icmp_seq=5 ttl=53 time=9.47 ms
64 bytes from a23-52-32-147.deploy.static.akamaitechnologies.com (23.52.32.147): icmp_seq=6 ttl=53 time=9.23 ms
^C
--- e6030.a.akamaiedge.net ping statistics ---
6 packets transmitted, 6 received, 0% packet loss, time 5018ms
rtt min/avg/max/mdev = 7.826/10.967/17.589/3.237 ms
<host 생성>
- --add-host
ubuntu@host1:~$ docker container run -it --add-host=abc.com:192.168.56.101 centos bash
[root@a3e867e51f02 /]# ping abc.com
PING abc.com (192.168.56.101) 56(84) bytes of data.
64 bytes from abc.com (192.168.56.101): icmp_seq=1 ttl=64 time=0.094 ms
64 bytes from abc.com (192.168.56.101): icmp_seq=2 ttl=64 time=0.089 ms
64 bytes from abc.com (192.168.56.101): icmp_seq=3 ttl=64 time=0.092 ms
64 bytes from abc.com (192.168.56.101): icmp_seq=4 ttl=64 time=0.060 ms
64 bytes from abc.com (192.168.56.101): icmp_seq=5 ttl=64 time=0.096 ms
64 bytes from abc.com (192.168.56.101): icmp_seq=7 ttl=64 time=0.095 ms
[root@a3e867e51f02 /]# cat /etc/hosts
127.0.0.1       localhost
::1     localhost ip6-localhost ip6-loopback
fe00::0 ip6-localnet
ff00::0 ip6-mcastprefix
ff02::1 ip6-allnodes
ff02::2 ip6-allrouters
**192.168.56.101  abc.com**
172.17.0.4      a3e867e51f02
<포트 개방(포트 바인딩)>
- --expose: 해당 포트를 외부로 개방
ubuntu@host1:~$ docker container run -d -P --name=myweb1 --expose=4001 nginx
Unable to find image 'nginx:latest' locally
latest: Pulling from library/nginx
2f44b7a888fa: Pull complete
8b7dd3ed1dc3: Pull complete
35497dd96569: Pull complete
36664b6ce66b: Pull complete
2d455521f76c: Pull complete
dc9c4fdb83d6: Pull complete
8056d2bcf3b6: Pull complete
Digest: sha256:4c0fdaa8b6341bfdeca5f18f7837462c80cff90527ee35ef185571e1c327beac
Status: Downloaded newer image for nginx:latest
50448f7785be4dc268df7d8e55f864ea34e8f9fa28b570e9857bd969e009ff9f
<포트 확인>
ubuntu@host1:~$ docker container port myweb1
80/tcp -> 0.0.0.0:32769
80/tcp -> [::]:32769
**4001/tcp -> 0.0.0.0:32768
4001/tcp -> [::]:32768**
<네트워크 호스트 모드 지정>
- 도커가 제공해주는 가상 네트워크를 사용하는 것이 아닌 직접 host 네트워크에 붙어 사용 (포트 지정을 하지 않음)
ubuntu@host1:~$ docker container run -d --name=nginx_host **--net=host** nginx
4d6ce059442a173bd676e8886d6b9292038b6fdb71afe51437be3158427230de
<로컬 호스트>
- curl localhost
ubuntu@host1:~$ curl localhost
<!DOCTYPE html>
<html>
<head>
<title>Welcome to nginx!</title>
<style>
html { color-scheme: light dark; }
body { width: 35em; margin: 0 auto;
font-family: Tahoma, Verdana, Arial, sans-serif; }
</style>
</head>
<body>
<h1>Welcome to nginx!</h1>
<p>If you see this page, the nginx web server is successfully installed and
working. Further configuration is required.</p>

<p>For online documentation and support please refer to
<a href="http://nginx.org/">nginx.org</a>.<br/>
Commercial support is available at
<a href="http://nginx.com/">nginx.com</a>.</p>

<p><em>Thank you for using nginx.</em></p>
</body>
</html>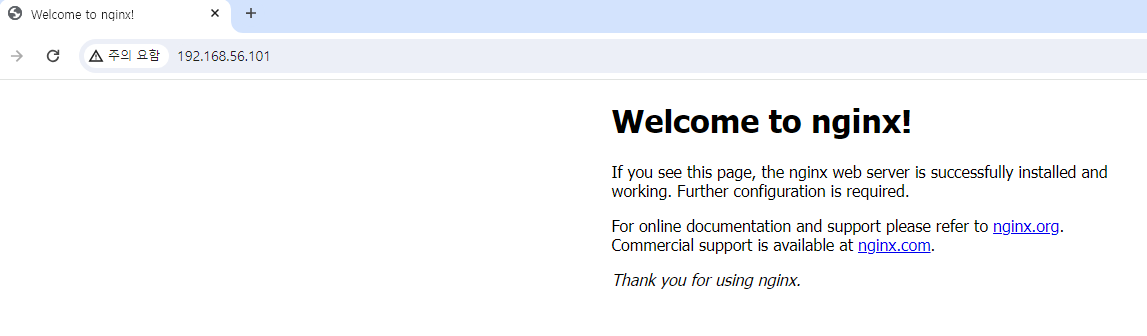
<같은 네트워크에 있는 컨테이너 통신 확인>
- net-check1 생성
ubuntu@host1:~$ docker container run --net=mynet -it --name=net-check1 ubuntu:14.04 bash
- net-check2 생성
ubuntu@host1:~$ docker container run --net=mynet -it --name=net-check2 ubuntu:14.04 bash
<컨테이너 가동하기>
- start > exec
- docker start + 컨테이너 이름
ubuntu@host1:~$ docker start net-check2
net-check2
ubuntu@host1:~$ docker start net-check1
net-check1
- 컨테이너 가동: docker exec -it (컨테이너 이름) /bin/bash
ubuntu@host1:~$ docker exec -it net-check1 /bin/bash
ubuntu@host1:~$ docker exec -it net-check2 /bin/bash
<ping 통신 확인>
- net-check1 > net-check2
root@34d929f05ee2:/# ping net-check2
PING net-check2 (172.18.0.2) 56(84) bytes of data.
64 bytes from net-check2.mynet (172.18.0.2): icmp_seq=1 ttl=64 time=0.074 ms
64 bytes from net-check2.mynet (172.18.0.2): icmp_seq=2 ttl=64 time=0.037 ms
64 bytes from net-check2.mynet (172.18.0.2): icmp_seq=3 ttl=64 time=0.041 ms
64 bytes from net-check2.mynet (172.18.0.2): icmp_seq=4 ttl=64 time=0.211 ms
64 bytes from net-check2.mynet (172.18.0.2): icmp_seq=5 ttl=64 time=0.048 ms
^C
--- net-check2 ping statistics ---
5 packets transmitted, 5 received, 0% packet loss, time 4109ms
rtt min/avg/max/mdev = 0.037/0.082/0.211/0.065 ms
- net-check2 > net-check1
root@34d929f05ee2:/# ping net-check1
PING net-check1 (172.18.0.3) 56(84) bytes of data.
64 bytes from net-check1.mynet (172.18.0.3): icmp_seq=1 ttl=64 time=0.061 ms
64 bytes from net-check1.mynet (172.18.0.3): icmp_seq=2 ttl=64 time=0.111 ms
64 bytes from net-check1.mynet (172.18.0.3): icmp_seq=3 ttl=64 time=0.069 ms
64 bytes from net-check1.mynet (172.18.0.3): icmp_seq=4 ttl=64 time=0.066 ms
64 bytes from net-check1.mynet (172.18.0.3): icmp_seq=5 ttl=64 time=0.097 ms
^C
--- net-check1 ping statistics ---
5 packets transmitted, 5 received, 0% packet loss, time 4131ms
rtt min/avg/max/mdev = 0.061/0.080/0.111/0.022 ms
>> 같은 네트워크 안에 있는 컨테이너끼리 ping 가능
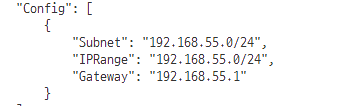
ubuntu@host1:~$ docker network inspect mynet2
[
    {
        "Name": "mynet2",
        "Id": "2881784d86b9b6c1b819567247bb37377b9e08ab3a2b94483aaa96b559c503b8",
        "Created": "2024-01-15T16:43:27.807888049+09:00",
        "Scope": "local",
        "Driver": "bridge",
        "EnableIPv6": false,
        "IPAM": {
            "Driver": "default",
            "Options": {},
            "Config": [
                {
                    **"Subnet": "192.168.55.0/24",
                    "IPRange": "192.168.55.0/24",
                    "Gateway": "192.168.55.1"**
                }
            ]
        },
        "Internal": false,
        "Attachable": false,
        "Ingress": false,
        "ConfigFrom": {
            "Network": ""
        },
        "ConfigOnly": false,
        "Containers": {},
        "Options": {},
        "Labels": {}
    }
]
'클라우드 + DevOps > Docker' 카테고리의 다른 글
| Docker 네트워크 실습 :: DNS와 부하분산 설정 (0) | 2024.02.20 |
|---|---|
| Docker 네트워크 실습 :: 서버 라우터 연결 (0) | 2024.02.19 |
| Docker 실습 :: Docker 이미지 수정과 적용 (0) | 2024.02.14 |
| Docker 이미지 / 컨테이너 관리 및 모니터링 명령어 (0) | 2024.02.13 |
| Docker 실습 :: Image 삭제 방법 (0) | 2024.02.12 |